Table of Contents
- Why Picking Technique Is the Foundation of Your Guitar Playing
- How to Hold a Guitar Pick Correctly (Grip, Angle, and Positioning)
- The Best Guitar Picking Techniques for Beginners, Explained
- Alternate Picking Exercises for Beginners: A Step-by-Step Practice Routine
- Economy Picking vs Alternate Picking: Which Should Beginners Learn First?
- Best Guitar Picks for Beginners: A Practical Selection Guide
- Ergonomics, Injury Prevention, and Genre-Specific Picking Tips
- Common Picking Mistakes and How to Fix Them
- Conclusion: Build Consistent Picking Habits That Actually Stick
Last Updated: May 29, 2026
Picking technique is the single most misunderstood skill in beginner guitar education. Most players spend months developing bad habits they'll spend years correcting. This guide covers the best guitar picking techniques for beginners, built from the ground up to give you a technique foundation that actually holds up as you advance. At Riff Quest, we track thousands of guitarists through structured practice routines, and the pattern is consistent: players who nail right-hand technique early progress dramatically faster than those who figure it out later.
Here's what most guides get wrong: they teach you what to do, but not why certain mechanics matter or what breaks down when you skip them. Below, we'll show you exactly how to hold a pick, how to build alternate picking from scratch, when economy picking makes more sense, and how to avoid the repetitive strain injuries that quietly sideline so many players.
Why Picking Technique Is the Foundation of Your Guitar Playing
Picking technique is the engine behind everything you'll ever play. Your left hand frets the notes, but your right hand controls timing, dynamics, articulation, and tone. A guitarist with great fretting and sloppy picking sounds inconsistent. A guitarist with clean picking and average fretting sounds musical.
The throughline of this entire guide is simple: consistency beats speed every time. Players who chase tempo before locking in clean mechanics almost always plateau. The ones who build slowly on a solid technique foundation reach intermediate level faster and with far fewer bad habits to unlearn.
This matters for every style, whether you're playing rhythm guitar, lead guitar solos, flatpicking acoustic, or working through pentatonic scale runs. The mechanics of how the pick contacts the string affect everything downstream: your tone, your speed ceiling, your ability to palm mute cleanly, and your long-term joint health.
The single most valuable investment a beginner can make is 15 minutes of slow, deliberate picking practice daily. Speed is a byproduct of consistency, not the other way around.
How to Hold a Guitar Pick Correctly (Grip, Angle, and Positioning)
Getting the grip right before anything else is the correct approach. A bad grip creates tension, slows down wrist movement, and produces inconsistent tone. The good news: there is a clear, teachable standard for how to hold a guitar pick correctly, and it takes about 10 minutes to get the feel of it.
Finding the Right Pick Grip
The standard pick grip uses the index finger and thumb. Curl your index finger naturally, as if you're making a loose fist. Place the pick on the side of the index finger's first joint, then press the pad of your thumb down on top of the pick. The tip of the pick should extend roughly 3-5mm past your thumb and finger.
Common grip mistakes:
- Gripping with the fingertip instead of the finger's side (creates tension and limits wrist movement)
- Letting too much pick stick out (reduces control and produces a flappy, imprecise attack)
- Death-gripping the pick (the most common beginner mistake; causes fatigue and kills dynamics)
The grip should feel firm but relaxed. If your knuckles are white, you're holding too tight. A light, consistent grip pressure is what allows the pick to glide across the string rather than dig into it.
Pick Angle and Contact Point
Pick angle is where things get nuanced. Most beginners hold the pick perfectly flat, perpendicular to the string. This works, but it creates a harsh attack and more string resistance. A slight angle, roughly 30-45 degrees from parallel, lets the pick glide through the string more smoothly, producing a warmer tone and faster downstroke and upstroke motion.
The contact point matters too. Picking near the bridge produces a bright, cutting tone ideal for lead guitar work and shredding. Picking closer to the neck gives a warmer, fuller sound that suits rhythm playing and fingerstyle-adjacent approaches. Experiment with both positions early so you understand what each sounds like.
Angle the pick slightly so the leading edge (the side that hits the string first) is tilted away from the guitar body. This small adjustment reduces pick resistance and makes alternate picking significantly smoother.
The Best Guitar Picking Techniques for Beginners, Explained
There are several core picking approaches every beginner should understand. The best guitar picking techniques for beginners aren't about choosing one and ignoring the others. They're about knowing which tool to reach for in which context.
Downpicking: The Starting Point for Every Beginner
Downpicking is exactly what it sounds like: every note is played with a downstroke. This is the right place to start. It builds consistency, trains your wrist movement, and forces you to focus on clean articulation before adding the complexity of upstrokes.
Classic rock rhythm guitar relies heavily on downpicking. The chunky, aggressive feel of riffs played with all downstrokes has a different energy than alternate picking, and that's intentional. Many experienced players choose downpicking for specific musical reasons, not because they can't do anything else.
How to practice downpicking:
- Hold the pick with the grip described above
- Rest your picking hand lightly on the strings near the bridge (palm muting position)
- Strike the low E string with a single, controlled downstroke
- Focus on consistent pick depth, hitting the string the same way every time
- Repeat across all six strings before moving to simple riffs
Alternate Picking: Downstrokes, Upstrokes, and Consistency
Alternate picking is the technique that opens up speed and efficiency. It alternates between downstroke and upstroke on every consecutive note, creating a continuous, pendulum-like motion. This is the core of most lead guitar playing and is essential for anyone working toward solos or fast single-note runs.
The challenge with alternate picking is synchronization. Your picking hand and fretting hand must move in perfect coordination. When they fall out of sync, you get a muddy, uneven sound. This is why tempo and consistency matter more than anything else in early practice.
According to Guitar World's guide to picking technique fundamentals, the most common synchronization error in beginner alternate picking is the picking hand running ahead of the fretting hand, especially on upstrokes.
Start slow. Embarrassingly slow. The goal isn't to play fast, it's to play clean.
Hybrid Picking and Chicken Picking
Hybrid picking combines a pick held between the thumb and index finger with the middle and ring fingers plucking individual strings. This technique is common in country, blues, and certain rock styles. Chicken picking is a specific subset of hybrid picking, characterized by a snappy, percussive attack created by digging the middle finger into the string and releasing it quickly.
These techniques aren't essential for absolute beginners, but they're worth knowing about early. Players who start exploring hybrid picking within their first year tend to develop more dynamic control and a wider tonal palette than those who stick exclusively to flatpicking. The technique also makes string skipping significantly easier, which pays off when you start playing more complex riffs and solos.
Alternate Picking Exercises for Beginners: A Step-by-Step Practice Routine
Alternate picking exercises for beginners work best when structured around slow, deliberate repetition rather than pushing for speed. This routine takes about 20 minutes and covers the core mechanics you need to build a solid technique foundation.
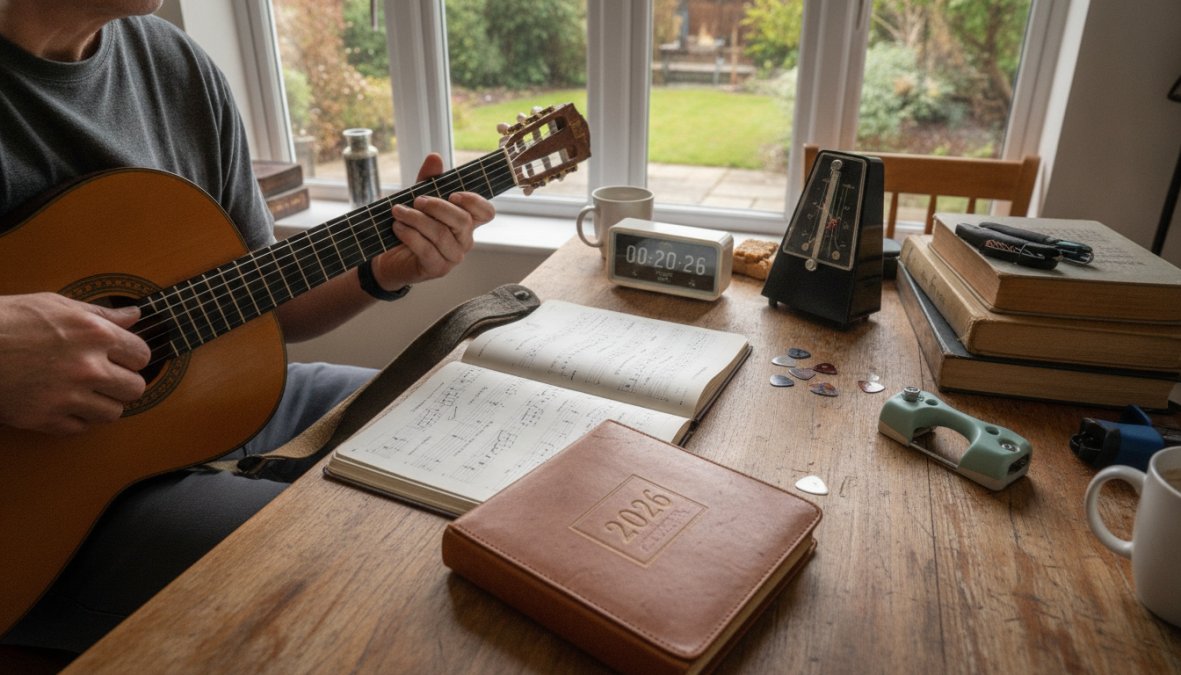
What you'll need: A guitar, a pick, a metronome (the free Google Metronome works perfectly for this), and a practice notebook.
Step 1: Warm Up (3 minutes) Play simple downstrokes on each open string, one per beat at 60 BPM. Focus on relaxed grip and consistent pick depth.
Step 2: Alternate Picking on One String (5 minutes) Set the metronome to 60 BPM. Play alternating down-up strokes on the low E string. One stroke per beat. When this feels automatic, move to 70 BPM.
Step 3: The 1-2-3-4 Chromatic Exercise (7 minutes) This is the classic beginner alternate picking exercise:
- Place fingers 1, 2, 3, 4 on frets 5, 6, 7, 8 of the low E string
- Pick each note with strict alternate picking (down, up, down, up)
- Move across all six strings, then back
- Start at 50-60 BPM; only increase tempo when the pattern is completely clean
Step 4: Pentatonic Scale Runs (5 minutes) Apply alternate picking to a basic pentatonic scale pattern in one position. This bridges the gap between exercises and actual musical application.
Using a Metronome to Build Speed Without Losing Accuracy
The metronome is not optional. Players who practice without one develop uneven tempo, which becomes nearly impossible to fix later. The goal isn't to practice at the metronome's speed. The goal is to let the metronome reveal where your picking breaks down.
The standard method for building speed is the "10 BPM ladder": play a phrase cleanly at a comfortable tempo, then add 10 BPM. When the phrase falls apart, drop back 5 BPM and consolidate there before climbing again. This approach builds genuine speed rather than sloppy fast playing.
Never practice a picking exercise at a tempo where you're making consistent errors. Practicing mistakes trains your muscle memory to make those same mistakes under pressure. If it sounds messy, slow down immediately.
Economy Picking vs Alternate Picking: Which Should Beginners Learn First?
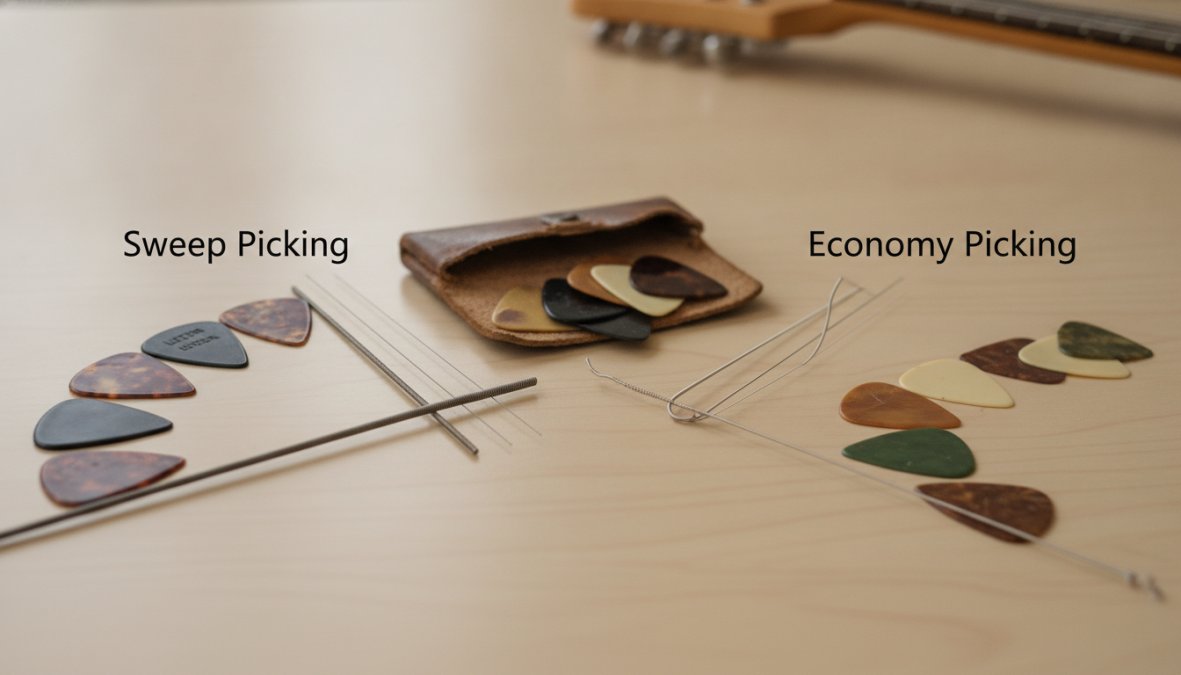
Alternate picking should come first, without question. Economy picking is a more efficient system that groups picking directions to minimize motion when crossing strings, but it requires a solid understanding of alternate picking mechanics to execute cleanly.
Economy picking is the practice of using a downstroke when moving to a lower (thicker) string and an upstroke when moving to a higher (thinner) string, regardless of strict down-up alternation. This reduces excess motion and is particularly efficient for scale runs that cross multiple strings.
The practical difference:
- Alternate picking: strict down-up-down-up regardless of string changes
- Economy picking: direction follows the string direction (efficient, but requires more planning)
| Technique | Best For | Difficulty | When to Learn |
|---|---|---|---|
| Downpicking | Rhythm, heavy riffs | Beginner | Week 1 |
| Alternate Picking | Lead, solos, speed | Beginner-Intermediate | Week 2+ |
| Economy Picking | Fast scale runs | Intermediate | After 3-6 months |
| Hybrid/Chicken Picking | Country, blues, dynamics | Intermediate | After 6+ months |
The reason to start with alternate picking is mechanical discipline. Economy picking allows shortcuts that can mask poor timing. Alternate picking forces you to confront synchronization problems directly. Once your alternate picking is clean, transitioning to economy picking for appropriate passages is straightforward.
As documented in Fender's official guitar learning resources, the most effective beginner curriculum builds alternate picking before introducing economy concepts, because the timing demands of strict alternation create the muscle memory that makes economy picking possible.
Best Guitar Picks for Beginners: A Practical Selection Guide
Pick selection is the most overlooked variable in beginner technique development. Most players grab whatever pick came with their guitar starter kit and never think about it again. This is a mistake, the thickness, material, shape, and surface texture of a pick directly affect your ability to execute the techniques covered in this guide. Using the wrong pick for a given technique is like trying to learn to write with a pen that's too heavy or too slippery. The mechanics suffer before you've even started.
This section connects pick characteristics directly to the techniques you're building, so you can make an informed choice rather than a random one.
Pick Thickness (Gauge): The Most Important Variable
Pick thickness is measured in millimeters and is the single biggest factor in how a pick behaves during different techniques. Here's how gauge maps to the techniques covered in this guide:
| Gauge | Thickness | Best Technique Match | What It Feels Like |
|---|---|---|---|
| Extra Thin | Under 0.46mm | Acoustic strumming only | Very flexible, forgiving, almost no resistance |
| Thin | 0.46mm-0.60mm | Acoustic strumming, basic downpicking | Slight flex, easy to strum, limited control for single notes |
| Medium | 0.60mm-0.80mm | Alternate picking, downpicking, beginner lead | Balanced flex and rigidity, the most versatile starting point |
| Heavy | 0.88mm-1.14mm | Alternate picking, economy picking, lead guitar | Firm attack, precise articulation, requires more wrist control |
| Extra Heavy | 1.2mm+ | Economy picking, sweep picking, advanced lead | Maximum control and attack, less forgiving of angle errors |
The beginner recommendation: Start with a medium gauge (0.73mm is the most common). It gives you enough rigidity to feel the pick tracking through the string on single notes, while still being forgiving enough for strumming. Many beginners assume they need thin picks because they feel easier to strum, but thin picks actively work against you when you start alternate picking, because the flex makes the attack inconsistent and the tone thin.
Once you've been playing for four to six weeks, try a heavy pick (0.88mm or 1.0mm) for your single-note practice sessions. Most players find the increased rigidity makes alternate picking feel more controlled and produces a noticeably fuller tone.
Pick Material: How It Affects Tone and Grip
Material is the second variable most beginners ignore, and it has a real effect on both tone and playability.
Nylon: The most common beginner material. Nylon picks have a slight flex even at heavier gauges, which produces a warmer, rounder attack. The surface is usually smooth, which can feel slippery once your hand warms up. Dunlop's nylon picks are the industry standard starting point, widely available, inexpensive, and available in every gauge. The 0.73mm Dunlop Nylon Standard is the most recommended beginner pick across most guitar education platforms for good reason: it's predictable, consistent, and cheap enough to lose without frustration.
Celluloid: The traditional pick material, used since the early days of the guitar. Celluloid picks have a slightly brighter attack than nylon and a glossy surface. They're a good choice for players who want a more vintage feel. The trade-off is that they wear down faster than harder materials.
Tortex (Delrin): Dunlop's Tortex picks are made from a harder plastic that produces a brighter, more defined attack than nylon. The matte surface provides significantly better grip, which is a practical advantage for players whose hands sweat during practice. Tortex picks are a strong upgrade choice once you've been playing for a month or two and want more precision. The 0.73mm (yellow) and 0.88mm (orange) Tortex picks are among the most widely used picks in professional and semi-professional playing.
Ultem/Ultex: A stiffer, denser material that produces a very bright, articulate attack with excellent durability. Dunlop's Ultex picks are popular with players who prioritize pick-to-string clarity. The stiffness means less forgiveness on angle errors, so these are better suited to intermediate players with established mechanics.
Acrylic and specialty materials: Picks made from acrylic, stone, metal, or wood exist and have devoted followings. For beginners, these are curiosities rather than necessities. The tonal differences are real but subtle, and the priority at the beginner stage is consistency, not tone optimization.
Pick Shape: Standard, Jazz, and Triangle
Most beginners use the standard teardrop shape without thinking about it. Shape affects how much of the pick tip contacts the string and how easy it is to maintain a consistent angle.
Standard (351 shape): The classic teardrop. The pointed tip gives good articulation for single notes while the rounded body is comfortable to hold. This is the right starting shape for most beginners.
Jazz III: A smaller, rounder pick with a sharper tip. The reduced size forces a more controlled grip and the sharp tip produces a very precise, articulate attack. Many lead guitarists, particularly those focused on speed, prefer the Jazz III because the smaller surface area reduces unintended string contact during fast runs. The Dunlop Jazz III is one of the most widely used picks in rock and metal lead playing. The trade-off: the smaller size feels awkward to many beginners initially and takes a week or two to get comfortable with.
Triangle (351 large or "Big Stubby"): A larger pick with three usable edges. Less common for beginners but useful for players who want more surface area and a heavier feel.
If you're primarily focused on building alternate picking technique, consider trying a Dunlop Jazz III (1.38mm) after your first month. The smaller size and sharp tip make string tracking more precise and many players find their alternate picking cleans up noticeably when they switch. It feels strange for the first few days, then becomes natural.
Surface Texture: The Grip Problem Nobody Talks About
Pick slippage is a real and underreported problem for beginners. When a pick rotates or shifts in your grip mid-phrase, it throws off your pick angle and attack consistency. This is often misdiagnosed as a technique problem when it's actually a grip-surface problem.
Solutions:
- Textured or embossed picks: Dunlop's Tortex picks have a matte surface that resists slipping. Picks with raised logos or grip patterns (like the Dunlop Max-Grip series) add tactile resistance specifically to address this problem.
- Hole-punched picks: Some picks have a small hole or indentation in the center that the thumb pad grips. These are a practical option for players with sweaty hands.
- DIY texture: Some players lightly sand the surface of a smooth pick with fine-grit sandpaper to add grip. This works and costs nothing.
Connecting Pick Choice to Technique: A Quick Reference
Here's how the picks discussed in this guide map to the techniques covered earlier:
- Learning downpicking and basic strumming: Dunlop Nylon Standard 0.73mm. Forgiving, inexpensive, widely available.
- Building alternate picking: Dunlop Tortex 0.73mm (yellow) or 0.88mm (orange). Better grip and more consistent attack than nylon.
- Developing lead guitar and economy picking: Dunlop Jazz III 1.38mm or Tortex 1.0mm. Precision tip, firm feel, minimal flex.
- Hybrid picking and country/blues styles: Medium nylon or celluloid picks work well because the slight flex complements the snapping motion of chicken picking. A medium Dunlop Nylon or Fender Medium celluloid pick is a practical choice here.
- Acoustic flatpicking: Medium to heavy Tortex or celluloid. Acoustic strings require more attack force than electric, and a firmer pick transfers energy more efficiently.
Buy a variety pack before committing to one pick. Dunlop sells sampler packs that include multiple gauges and materials for a few dollars. Spend one practice session with each gauge and pay attention to how your alternate picking feels and sounds. Most beginners discover their preferred pick within the first week of experimenting, and it's rarely the thin pick they started with.
Ergonomics, Injury Prevention, and Genre-Specific Picking Tips
This is the section most guitar tutorials skip entirely. It's also the section that could save you from a repetitive strain injury that sidelines your playing for months.
Avoiding Tension and Repetitive Strain
Tension is the enemy of both technique and physical health. Most picking injuries develop slowly, from accumulated tension in the wrist, forearm, and elbow. The warning signs are easy to miss until the problem is serious.
Common injury triggers:
- Practicing for long sessions without breaks (more than 45 minutes without a 10-minute rest)
- Gripping the pick too tightly, especially when fatigued
- Anchoring the picking hand too firmly against the guitar body (restricts natural wrist movement)
- Practicing at tempos that require maximum tension to execute
The picking motion should originate primarily from the wrist, with some forearm rotation. Elbow movement can contribute at faster tempos, but players who rely on large elbow movements rather than wrist movement tend to develop strain faster. According to Musician's health resources at The Musician's Clinics of Canada, repetitive strain injuries are among the most common reasons guitarists stop playing, and the majority are preventable with proper technique and rest habits.
If you feel any tingling, numbness, or persistent soreness in your picking hand or forearm, stop and rest. These are not signs to push through.
Adapting Your Picking Style to Different Genres
The mechanics of picking don't change between genres, but the emphasis does.
- Rock and metal: Heavy downpicking for rhythm, strict alternate picking for lead. Palm muting is central. Pick angle tends to be more aggressive.
- Country: Hybrid picking and chicken picking are standard. The snappy attack of chicken picking defines the genre's lead tone.
- Blues: Alternate picking with deliberate dynamics. Slow, expressive bends benefit from heavier pick gauge for better string control.
- Acoustic/folk: Flatpicking and crosspicking are common. String skipping patterns appear frequently in fingerstyle-adjacent acoustic work.
- Classical and fingerstyle: Picks are often not used at all. Understanding the picking mechanics of fingerstyle helps even pick-focused players develop better right-hand awareness.
Common Picking Mistakes and How to Fix Them
Most picking problems fall into two categories: mechanical errors you can feel, and tonal errors you can hear. Most guides only cover the first category. This section covers both, because a beginner who can diagnose a bad sound from their amp is far better equipped to self-correct than one who only knows to "slow down and try again."
Mechanical Mistakes (What You Feel)
Mistake 1: Inconsistent pick depth The pick digs deep on some notes and barely grazes others, producing uneven volume and attack. This is almost always a grip tension issue: the hand tightens on louder notes and relaxes on quieter ones unconsciously.
Fix: Practice with deliberate palm muting so you can feel consistent string contact through the side of your hand. Slow down until every note produces the same physical sensation of resistance. Record a short clip and listen for volume spikes, your ears will catch what your hand misses.
Mistake 2: Defaulting to downstrokes under pressure Players revert to all downstrokes when tempo increases or when they're nervous. The upstroke gets dropped because it feels less controlled, but skipping it creates a rhythmic limp that becomes deeply ingrained if left uncorrected.
Fix: Use a metronome and say "down-up" aloud in sync with each stroke during practice. This verbal cue forces conscious attention on the upstroke. Alternatively, practice upstroke-only runs: play a scale using nothing but upstrokes for two minutes. This isolates the weaker motion and builds equal confidence in both directions.
Mistake 3: Tension during speed attempts Trying to play faster triggers a grip reflex, the hand tightens, which actually slows the pick down and kills dynamics. This is one of the most counterproductive feedback loops in beginner practice.
Fix: Drop the tempo by 20 BPM below where tension appears. Play until the tension disappears completely, then increase by 5 BPM at a time rather than 10. The goal is to find the highest tempo at which your hand stays relaxed, not the highest tempo at which you can physically produce notes.
Mistake 4: Poor synchronization between hands The picking hand and fretting hand are out of phase, the pick hits the string a fraction of a second before or after the fretting finger lands. The result is a muffled attack, buzzing, or a note that sounds like two notes played slightly apart.
Fix: Practice the chromatic 1-2-3-4 exercise at 40 BPM with a specific focus: the fretting finger must be fully pressed before the pick moves. Think of it as "fret, then pick" rather than both happening simultaneously. At very slow tempos, this sequence becomes audible and correctable.
Mistake 5: No dynamic variation Every note hits at the same volume, making playing sound mechanical and expressionless. This is a sign that the pick is being used as a hammer rather than a brush.
Fix: Practice scales with intentional accent patterns, play the first note of each group of four louder and the remaining three softer. This trains the wrist to modulate pressure mid-phrase, which is the foundation of musical phrasing in every style from blues to classical.
Tonal Mistakes (What You Hear), The Gap Most Guides Miss
This is the troubleshooting layer that almost no beginner resource covers, and it's the reason many players think their guitar or amp sounds bad when the actual problem is pick mechanics.
Problem: Scratchy or raspy tone on single notes This is one of the most common beginner complaints and almost always has a mechanical cause rather than a gear cause.
Causes and fixes:
- Pick held perfectly flat (90 degrees to the string): A flat pick angle creates maximum surface friction as the pick drags across the string winding, producing a scratchy, abrasive sound. Fix: Rotate the pick so the leading edge is angled roughly 30-45 degrees away from the guitar body. The pick should glide through the string rather than scrape across it. The tone will immediately become smoother and warmer.
- Too much pick exposed past the fingers: When more than 5-6mm of pick tip extends past the thumb and index finger, the pick flexes unpredictably on contact, creating an inconsistent, buzzy attack. Fix: Reduce the exposed tip to 3-4mm and notice how the attack becomes more defined.
- Picking too close to the fretboard: The strings have maximum flexibility near the soundhole or neck pickup, so the pick drags more and produces a looser, scratchier sound. Move the picking position toward the bridge by 1-2 inches and compare.
Problem: Thin, weak, or hollow tone on rhythm playing This is distinct from scratchiness, the notes are clean but lack body and presence.
Causes and fixes:
- Pick gauge too thin for the technique: Thin picks (under 0.60mm) flex significantly on contact, absorbing energy that should transfer to the string. For single-note picking and rhythm riffing, this produces a thin, papery tone. Switching to a medium (0.73mm) or heavy (1.0mm+) pick immediately adds attack and body to the sound. This is one of the fastest tone improvements a beginner can make at zero cost if they already own multiple picks.
- Picking angle too shallow (nearly parallel to the string): While some angle is good, an extreme angle means only the very edge of the pick contacts the string, reducing the energy transfer. A moderate angle, not flat, not extreme, produces the fullest tone.
- Picking position too close to the neck: As noted above, neck-position picking produces warmth but can sound hollow on electric guitar, especially with high-gain settings. Move toward the bridge for more definition.
Problem: Harsh, brittle, or ice-pick tone on electric guitar This is the opposite of thin, the tone is aggressive and fatiguing to listen to.
Causes and fixes:
- Picking directly over the bridge pickup with a heavy pick and flat angle: This combination maximizes brightness and attack to the point of harshness. Move the picking position slightly toward the neck and introduce a small pick angle to soften the attack.
- Grip too tight: A tense grip transfers more force into the string, increasing the attack transient and emphasizing high frequencies. Consciously loosening the grip, even slightly, produces a noticeably warmer, more controlled tone.
A quick diagnostic: if your tone sounds bad, change one variable at a time, pick angle, then pick position, then grip pressure, then pick gauge. Most tone problems are solved within those four adjustments without touching the amp.
Do not assume a scratchy or harsh tone means you need a new guitar or amp. The vast majority of beginner tone complaints are picking mechanics problems. Fix the mechanics first, then evaluate the gear.
The good news about both mechanical and tonal picking mistakes is that they respond quickly to targeted practice. Unlike some technique problems that take years to correct, most picking issues show measurable improvement within two to four weeks of deliberate, focused work.
A useful resource for troubleshooting specific tone and technique problems is the Guitar Noise beginner technique guide, which covers common right-hand issues in practical, non-technical language.
Conclusion: Build Consistent Picking Habits That Actually Stick
The biggest obstacle for most beginners isn't understanding what to practice. It's tracking whether practice is actually producing improvement over time. Without visible progress, motivation drops and practice becomes inconsistent.
Frequently Asked Questions
What is the best way to hold a guitar pick for beginners?
Hold the pick between the side of your index finger and the pad of your thumb, with roughly 5-8mm of the tip exposed. Keep your grip firm but relaxed, squeezing too hard creates tension that slows down your picking. The pick should be angled slightly rather than perfectly flat against the string, which helps with smoother downstrokes and upstrokes. Experiment with different gauges to find what feels natural before locking in your grip.
Should I use alternate picking or economy picking as a beginner?
Start with alternate picking. It builds the most transferable right-hand technique foundation, strict down-up-down-up motion trains your wrist movement, timing, and consistency across all styles. Economy picking, where you avoid redundant pick strokes when changing strings, is more efficient but harder to learn without a solid alternate picking base. Once your alternate picking feels automatic on pentatonic scale runs and basic riffs, economy picking becomes a natural upgrade rather than a confusing detour.
What are the most common guitar picking mistakes beginners make?
The most common mistakes are gripping the pick too tightly (causes tension and fatigue), using too much pick depth into the string (slows you down and muddies tone), neglecting a metronome during practice (builds bad timing habits), and skipping downpicking before jumping to alternate picking. Many beginners also use elbow movement instead of wrist movement for speed, which limits articulation and increases injury risk. Fixing these early makes every other guitar picking technique for beginners much easier to develop.
How long does it take to get comfortable with alternate picking?
With consistent daily practice of 15-20 minutes, most beginners feel comfortable with basic alternate picking within 4-8 weeks. Clean execution at moderate tempo on a pentatonic scale can take 2-3 months. Speed comes last, accuracy and consistency always come first. Using a metronome and tracking your progress (for example, logging your BPM milestones in a tool like Riff Quest) dramatically shortens the learning curve by making improvement visible and keeping practice structured.
Do I need to learn fingerstyle or pick technique first?
For most beginners, starting with a pick is easier and more versatile across rock, blues, and lead guitar styles. Flatpicking and alternate picking give you immediate access to riffs, solos, and rhythm parts. Fingerstyle and hybrid picking are valuable additions once you have basic pick control. However, if your primary goal is classical, folk fingerpicking, or acoustic fingerstyle, learning fingerstyle from the start makes sense. Many guitarists eventually develop both, they are complementary, not competing skills.
Inconsistent practice is the real reason most beginners plateau on picking technique. Riff Quest addresses this directly with a free progress tracker and an exercise library of 144 animated technical drills, including alternate and economy picking, so you always know exactly what to practice next.
Practice Picking With Guided Drills
Browse the Riff Quest exercise library for animated picking drills, track your accuracy, and build consistent habits that stick.
Browse the Exercise Library