Table of Contents
- Why Most Advanced Guitar Practice Techniques Fail (And What to Do Instead)
- Deliberate Practice for Guitar: The Framework That Actually Builds Skill
- Metronome Exercises for Guitar: Speed, Accuracy, and Synchronization
- Advanced Guitar Practice Techniques for Fretboard Mastery
- Guitar Ear Training Techniques That Sharpen Improvisation
- Ergonomics and Injury Prevention: Tension-Free Playing for the Long Game
- Guitar Practice Schedule Template: Building a Customizable Daily Routine
- Conclusion: Turn Practice Into Measurable Progress
Last Updated: May 17, 2026
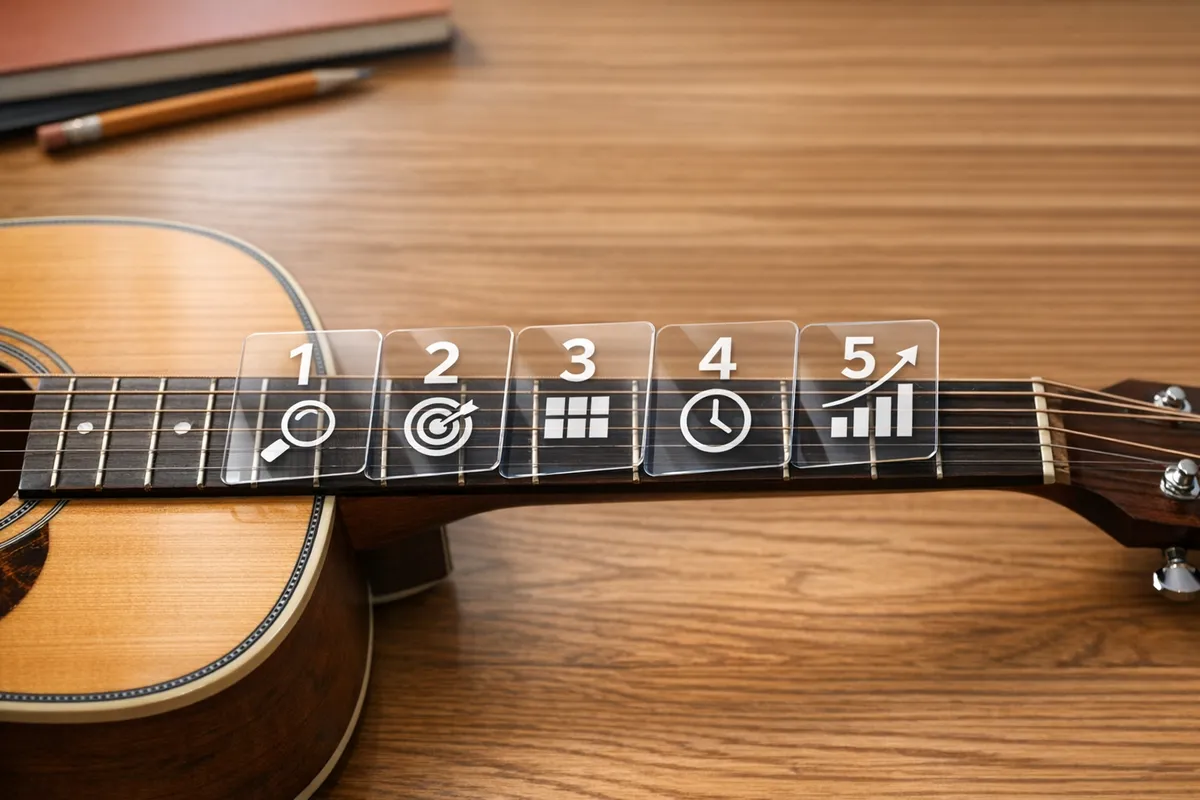
Most guitarists plateau not because they lack talent, but because they practice the wrong things the wrong way. Advanced guitar practice techniques separate players who grind for years without improvement from those who make measurable leaps every month. At Riff Quest, we've tracked thousands of practice sessions and identified exactly where dedicated players lose momentum: they confuse activity with progress. Below, we'll show you the exact framework, drills, and scheduling strategies that actually build skill at the advanced level. The five practice systems covered here address every dimension of development, from physical technique to musical intelligence.
Here's what most guides get wrong: they treat advanced playing as a collection of cool tricks to learn. Sweep picking, two-hand tapping, legato runs. The assumption is that if you can execute each technique in isolation, you'll become a better player. The reality is more demanding. Real advancement requires deliberate targeting of weaknesses, integration of music theory into physical practice, and a structured daily routine that compounds over time.
Why Most Advanced Guitar Practice Techniques Fail (And What to Do Instead)
The biggest mistake advanced players make is practicing what they're already good at. It feels productive. The notes flow, the licks sound clean, and the session ends with a feeling of accomplishment. But comfort-zone practice is the enemy of growth.
Advanced guitar practice techniques fail primarily because they lack specificity. A player who runs through scales for 30 minutes without a target tempo, a target finger pattern, or a specific weakness to address has done little more than warm up. Deliberate practice, by contrast, is uncomfortable by design. It targets the exact point where execution breaks down.
The second failure mode is ignoring the connection between technique and musicality. Speed without phrasing is noise. Arpeggios without harmonic context are finger exercises. The players who stand out aren't necessarily the fastest. They're the ones who know when to play a note and when to leave space. That judgment comes from integrating music theory into every practice session, not treating theory as a separate academic exercise.
A third failure: no tracking. Without data, you can't see progress. Many guitarists spend months on a technique and genuinely don't know whether they've improved. A structured system with logged tempos, session notes, and skill benchmarks changes that completely.
Practicing at speeds beyond your current clean threshold builds bad muscle memory that becomes increasingly difficult to unlearn. Always establish a clean baseline tempo before pushing speed.
Deliberate Practice for Guitar: The Framework That Actually Builds Skill
Deliberate practice for guitar is a structured method of skill development that targets specific weaknesses through focused, uncomfortable repetition with immediate feedback. It's the opposite of noodling. Every session has a defined target, a measurable outcome, and a clear stopping condition.
According to research cited in Anders Ericsson's work on expert performance, the key variable separating elite performers from experienced amateurs isn't hours logged but the quality of those hours. This applies directly to guitar.
How to Identify Your Real Weaknesses
Most players overestimate their strengths and underestimate their weaknesses because they avoid the latter during practice. To find your real gaps, record yourself playing through a difficult passage at performance tempo without stopping. Then listen back critically.
Common patterns to listen for:
- Inconsistent note volume across strings (synchronization issue)
- Hesitation at position shifts (fretboard navigation gap)
- Tension buildup that causes timing drift (ergonomics problem)
- Clean single notes but muddy arpeggios (picking accuracy issue)
Once you've identified the specific breakdown point, that becomes your practice target for the week. Not the full lick. Not the whole scale. The exact bar where execution fails.
Focused Repetition vs. Mindless Noodling
Focused repetition means isolating a 2-4 note cell, setting a metronome 10-15 BPM below your failure point, and repeating that cell until it's automatic. Then you move the metronome up by 2 BPM. This is slow. It's also the only method that builds genuine muscle memory.
Mindless noodling feels creative and is genuinely enjoyable. It has its place in a practice session, but it shouldn't be confused with skill development. Reserve the first 20-30 minutes of any session for deliberate, targeted work before you play freely.
Metronome Exercises for Guitar: Speed, Accuracy, and Synchronization
Metronome exercises for guitar are the foundation of every advanced technique, not an optional add-on for beginners. The metronome reveals truth. If your picking hand and fretting hand aren't synchronized, the click will expose it immediately.
Start every technique drill with the metronome set to a tempo where you can execute the passage perfectly for 10 consecutive repetitions. That's your baseline. Increase by 2 BPM only when you hit 10 clean reps. This approach sounds conservative, but it compounds fast.
Alternate Picking and Economy Picking Drills
Alternate picking is the foundation of lead guitar dexterity. The drill most players skip is the string-change drill: alternate pick across all six strings on a single note per string, maintaining strict down-up-down-up motion. This isolates the picking arc and exposes any inconsistency in your pick angle at string transitions.
Economy picking, by contrast, uses directional picking logic: when moving to a lower string, use a downstroke; when moving higher, use an upstroke. This reduces pick travel and increases speed for scale runs. The trade-off is that it requires relearning ingrained alternate picking habits, so practice both systems separately before combining them.
A practical drill sequence:
- Single-string alternate picking at 60 BPM, 16th notes
- String-crossing alternate picking (one note per string, all six strings)
- Scale run with strict alternate picking
- Same scale run with economy picking
- Compare tone consistency and timing between both approaches
Legato, Hammer-ons, and Pull-off Sequences
Legato technique is where finger independence becomes critical. The goal is to produce notes of equal volume using only fretting hand pressure, with the picking hand providing the initial attack for the first note only.
A common mistake is letting the index finger lift off the string during hammer-on sequences. Keep the lower fingers anchored while the higher fingers execute the hammer-on. This maintains clean tone and reduces unnecessary hand tension.
For pull-offs, the pulling motion should be slightly downward toward the floor, not straight back. This generates enough friction to produce a clear note. Practice this in isolation before combining hammer-ons and pull-offs into full legato runs.
Record your legato runs and listen back at half speed. Volume inconsistency between hammered and picked notes is almost impossible to hear in real time but obvious on playback. This is the fastest way to diagnose weak fingers.
Advanced Guitar Practice Techniques for Fretboard Mastery
Fretboard mastery is not about memorizing more patterns. It is about developing a spatial model of the neck so complete that you can locate any note, any chord tone, or any scale degree in any position without conscious calculation. The players who move freely across the entire neck are not working harder than pattern-locked players, they are working with a fundamentally different mental map.
This section covers how to build that map systematically, and how to connect it directly to the sweep picking, tapping, and string-skipping techniques that require it.
Building a Spatial Fretboard Map: The CAGED System and Its Limits
The CAGED system is the most widely taught fretboard navigation framework, and it works, up to a point. It gives you five chord shapes that tile the entire neck and five corresponding scale positions. Most intermediate players know all five. Most advanced players have discovered the system's blind spot: CAGED organizes the neck by chord shape, not by interval function. That means a player who knows all five CAGED positions can still be "shape-locked", they know where the patterns are but not what each note does harmonically.
The upgrade is to overlay interval awareness onto the CAGED map. Here is the drill:
- Choose one CAGED position, say, the "E shape" rooted at the 7th fret (B major).
- Play through the major scale in that position, but instead of thinking "next finger," call out the interval of each note as you play it: root, major second, major third, perfect fourth, and so on.
- Stop on each chord tone (root, third, fifth) and hold it for one beat. This trains your ear and your hand to recognize chord tones within the scale pattern.
- Repeat in all five CAGED positions for the same key before moving to a new key.
This process takes weeks, not days. But the result is that you stop seeing the neck as a collection of shapes and start seeing it as a grid of intervals, which is exactly the mental model that allows free positional movement.
Scale-Based Routines: Modes, Harmonic Minor, and Position Shifting
The harmonic minor scale is one of the most expressive tools in lead guitar. Its raised seventh degree creates a distinctive tension, a minor second interval between the sixth and seventh scale degrees, that sits between classical and metal in character. Practice it in all seven positions across the neck, not just the first shape you learned. The position that most players skip is the one starting on the raised seventh itself, which produces the Phrygian dominant mode (the fifth mode of harmonic minor), the scale behind much of the Spanish-influenced and neoclassical guitar vocabulary.
Mode practice should always be anchored to a tonal center and a chord. Playing a Dorian scale without a backing drone or chord progression is an academic exercise with limited transfer to real playing. The protocol that builds genuine modal vocabulary:
- Set a drone on your tonal center (a phone app, a looper pedal, or a DAW track).
- Play through the mode slowly, stopping on each note and listening to its quality against the drone.
- Identify the one or two notes that define the mode's character (for Dorian, the raised sixth; for Phrygian, the b2).
- Build a four-bar phrase that deliberately features those defining tones on strong beats.
- Record it and listen back.
Position shifting is the connective tissue between all of this. A practical drill that forces spatial thinking: play a two-octave scale ascending entirely within one CAGED position, then descend using a different position. The shift forces you to locate the same notes in a new area of the neck, which is exactly the skill that breaks positional lock.
For an additional challenge, practice three-note-per-string scale patterns, which do not align with CAGED shapes. These patterns require larger position shifts and build a complementary spatial model that fills the gaps CAGED leaves.
Sweep Picking: The Mechanics Most Players Get Wrong
Sweep picking is the technique most advanced players want and most players approach incorrectly, not because the pick motion is hard to learn, but because the fretting hand coordination is almost always the actual bottleneck.
The pick motion is a continuous rake across strings, driven by forearm rotation rather than wrist movement alone. Think of it as a controlled fall across the strings, not a series of individual downstrokes. The pick should maintain consistent contact angle throughout the sweep, any variation in angle produces inconsistent tone across the arpeggio.
The fretting hand is where most sweeps break down. Each finger must:
- Press the string firmly enough to produce a clear note.
- Release pressure immediately after the pick passes that string, not after the next string, immediately.
- Never fully lift off the string (which causes unwanted open-string noise), instead, relax pressure just enough to mute.
This rolling mute technique is the difference between a sweep that sounds like a fluid arpeggio and one that sounds like a strummed chord. Practice it in isolation before adding pick motion:
- Fret a three-string triad shape (e.g., a root-position major triad on strings 4, 3, 2).
- Without picking, roll your fretting finger pressure from string 4 to string 3 to string 2, muting each string as you move to the next.
- Listen for silence on each string after you release it. If you hear buzz or sustain, your muting is incomplete.
- Only when the rolling mute is clean should you add the picking hand.
Progression for building sweep picking:
- Week 1-2: Three-string major and minor triads, 60-70 BPM, ascending only.
- Week 3-4: Three-string triads ascending and descending, with turnaround at the top.
- Week 5-6: Five-string arpeggios (add the octave root on string 1 and the fifth on string 5).
- Week 7+: Full six-string arpeggios and arpeggio sequences across positions.
Two-Hand Tapping: Extending Range and Building Coordination
Two-hand tapping extends the fretboard range dramatically by using the picking hand's index or middle finger as a second fretting hand. The technique requires independent coordination between two hands that have spent years developing very different motor patterns, which is why most players plateau on tapping faster than on other techniques.
The tapping finger should land on the string with a firm, perpendicular strike. A common error is tapping at an angle toward the headstock or body, which produces a muted or buzzy note because the string is not fully depressed against the fret. Practice tapping isolated single notes on a single string, tap, pull off to a fretted note, hammer on, repeat, before building any lick.
The pull-off from the tapped note is the most technically demanding part. The tapping finger must pull slightly downward (toward the floor) as it releases, generating enough friction to sound the lower fretted note cleanly. If the pull-off note is weak or silent, the tapping finger is lifting straight back rather than pulling through.
A foundational tapping drill that isolates coordination:
- Fret the 5th and 8th frets on the high E string with your index and ring fingers.
- Tap the 12th fret with your picking hand's index finger.
- Pull off the tap to the 8th fret, then pull off the 8th to the 5th, then hammer back to the 8th, then tap the 12th again.
- This four-note cell (12-8-5-8) is the building block of most tapping licks. Master it at 60 BPM before increasing tempo.
String Skipping: Picking Accuracy Under Pressure
String skipping builds picking accuracy across non-adjacent strings and is, as noted in Guitar Techniques magazine's technique guides, consistently underrepresented in advanced practice routines despite being a direct test of picking precision.
The core challenge is that the picking arc must travel further than in standard scale playing, which exposes excess tension in the picking hand and forearm. Any tension causes the pick to overshoot or undershoot the target string.
A progressive string-skipping drill sequence:
- Adjacent skip (skip one string): Play a note on string 6, skip string 5, play string 4. Alternate pick throughout. Start at 60 BPM.
- Double skip: String 6, skip strings 5 and 4, play string 3. The arc is now larger, watch for tension in the forearm.
- Pattern skipping: Play a two-note pattern on string 6, skip to a two-note pattern on string 4, skip to string 2. This introduces fretting hand coordination alongside the picking challenge.
- Melodic application: Take a scale pattern you know well and rearrange it so that consecutive notes skip strings. This forces you to find the same notes in non-adjacent positions, which also reinforces fretboard mapping.
String skipping at high tempos with excess picking hand tension is a common cause of forearm strain. If you feel tightness in the forearm or wrist during string-skipping drills, reduce tempo immediately and check that your picking motion is driven by forearm rotation, not wrist flexion. Tension at speed compounds quickly.
The payoff for mastering string skipping extends beyond the technique itself: the spatial awareness and picking precision it builds transfers directly to sweep picking accuracy, economy picking transitions, and any technique that requires the pick to cross multiple strings cleanly.
Guitar Ear Training Techniques That Sharpen Improvisation
Improvisation is the practical stress-test of everything you have practiced. Most guides treat ear training and music theory as separate academic modules bolted onto the end of a technique article. That separation is exactly why so many advanced players can execute difficult passages in isolation but freeze or default to the same pentatonic box the moment a backing track starts. The goal of this section is to collapse that wall entirely, to show you how ear training, music theory, and physical technique are the same skill viewed from three different angles.
Transcription as a Diagnostic Tool, Not Just a Learning Exercise
Transcription is the most recommended ear training exercise in guitar education, and for good reason. But most guides stop at "learn solos by ear." The deeper application is using transcription as a diagnostic: once you have learned a passage by ear, you analyze why it works, then immediately translate that finding into a physical drill.
Here is a concrete process:
- Choose a 4-8 bar phrase from a player whose phrasing you admire. Learn it entirely by ear, no tab, no video.
- Notate or tab it yourself, even roughly. The act of writing it forces you to commit to specific pitches and rhythms.
- Identify the structural choices: Which scale degrees land on beat one? Where does the player use chromatic approach notes? What is the rhythmic density, are they playing 16th notes or leaving space?
- Isolate one device from that phrase, say, a chromatic enclosure around the root, and build a 10-minute drill around that single device in three different positions on the neck.
- Play the device over a backing track in the same key before moving on.
This loop, hear, decode, isolate, drill, apply, is what turns transcription from a passive learning exercise into an active technique-building system. The physical drill in step four is the bridge that most ear training advice never builds.
Integrating Music Theory into Your Soloing and Licks
Music theory is not separate from technique. It is the decision-making layer that determines which notes your trained fingers reach for. A player who understands that the major seventh of a dominant chord creates unresolved tension will make a different melodic choice than a player who has memorized the same scale shape without that context, and the listener will hear the difference.
The most practical integration method is function-first scale practice. Instead of running a scale pattern from root to root, assign a harmonic function to every note before you play it:
- Over a dominant seventh chord (e.g., G7): the b7 (F) pulls toward the root; the major third (B) defines the chord's character; the 9th (A) adds color without tension; the b9 (Ab) creates maximum tension and demands resolution.
- Over a minor chord: the b3 and b7 are stable; the 2nd and 6th are color tones; the b2 (Phrygian flavor) creates a dark, unresolved quality.
Once you know the function of each degree, you practice targeting: deliberately landing on a specific scale degree on beat one of each bar. Start with the root. Then practice landing on the fifth. Then the b7. This is not a restriction, it is a compositional constraint that forces your ear and your hands to work together rather than independently.
The Tension-Resolution Drill
This drill directly connects ear training to physical practice and is almost entirely absent from competitor guides.
Setup: Choose a static chord (e.g., Cmaj7). Set a metronome to a comfortable tempo, 70-80 BPM works well. Play one note per beat over four bars.
Round 1, Stability: Play only the root, third, and fifth. Listen to how each note sits against the chord. Notice that none of them create urgency.
Round 2, Tension: Play only the major seventh (B over Cmaj7), the ninth (D), and the sharp eleventh (F#, Lydian flavor). Listen to the floating, unresolved quality. Do not resolve it. Sit in the tension.
Round 3, Phrase building: Alternate between a tension note and a resolution note across two beats each. B resolves to C. F# resolves to E. D resolves to C. Now you are building phrases with intentional direction, not just running scales.
Practice this drill in every key over the course of a week. The physical result is that your hands start reaching for tension and resolution notes instinctively during improvisation because your ear has been trained to hear the difference and your fingers have been trained to find it.
Modes as Emotional Palettes, Not Scale Shapes
Modes become genuinely useful when you stop thinking of them as scale shapes and start thinking of them as emotional palettes. This reframe changes how you practice them.
- Dorian (minor with a raised sixth): warm, slightly hopeful minor. Useful over minor chords in jazz, blues-rock, and funk contexts. The raised sixth (the distinctive note) sounds best as a melodic peak, not a passing tone.
- Phrygian (minor with a b2): tense, Spanish-influenced, dark. The b2 is the defining color, practice landing on it deliberately and resolving it down to the root.
- Lydian (major with a #4): bright, floating, cinematic. The #4 creates a dreamy instability. Composers use it for "otherworldly" moments. Practice sustaining the #4 and letting it hang before resolving.
- Mixolydian (major with a b7): bluesy, grounded, slightly unresolved. The b7 is the key note, it prevents the scale from feeling fully resolved, which is why it works so well over dominant chords.
For each mode, the practice protocol is the same: drone on the tonal center, play the mode, find the one or two notes that define its emotional character, and build a short phrase that features those notes prominently. Then record it. Listen back and ask: does this sound like the emotion I was targeting? If not, adjust which degrees you are emphasizing.
As documented in Berklee Online's music theory resources, connecting theory to emotional intent is the fastest path from technical player to musical one, but the mechanism for doing that is deliberate, function-aware practice, not passive scale memorization.
Keep a "phrase journal", a simple notebook or voice memo folder where you record short improvised phrases you like. After a week, transcribe them and analyze which scale degrees you gravitated toward. Most players discover they have unconscious preferences that, once identified, can be developed intentionally rather than stumbled upon randomly.
Ergonomics and Injury Prevention: Tension-Free Playing for the Long Game
Tension-free playing is not a comfort preference. It's a performance requirement and an injury prevention strategy. Many advanced players develop repetitive strain injuries precisely because they've practiced difficult techniques with excess tension for years.
The fretting hand is the primary injury site. The most common problem is excessive thumb pressure on the back of the neck, which causes the fingers to curl inward and increases tension across the entire hand. The thumb should rest lightly behind the middle finger, perpendicular to the neck, acting as a guide rather than a clamp.
Check these ergonomic fundamentals before every practice session:
- Guitar position: The body of the guitar should sit against your torso without requiring your arm to hold it in place
- Picking wrist: Slight downward angle, no extreme flexion or extension
- Fretting wrist: Relatively straight, with the elbow dropped to allow finger reach without wrist bending
- Shoulder tension: Both shoulders should be level and relaxed, not raised toward the ears
If you feel pain during practice, stop. Pain is not effort. It's a warning signal that something in your technique or posture needs adjustment. Many career-ending injuries in guitarists started as minor discomfort that was ignored.
Continuing to practice through hand or wrist pain causes cumulative damage. A two-day break to address technique is far less costly than a six-week forced rest from a repetitive strain injury.
According to American Physical Therapy Association's guidance on musician health, musicians who incorporate regular stretching and ergonomic awareness into their practice routines significantly reduce their injury risk over a playing career.
Guitar Practice Schedule Template: Building a Customizable Daily Routine
A guitar practice schedule template is a structured daily framework that allocates specific time blocks to technique, theory, repertoire, and ear training to ensure balanced, measurable development. Without a template, most players default to whatever feels good that day, which means consistent weaknesses never get addressed.
Here's a 60-minute template that works for advanced players:
| Time Block | Focus Area | Example Activity |
|---|---|---|
| 0-10 min | Warm-up | Slow chromatic exercises, stretches |
| 10-25 min | Technique drill | Targeted weakness (e.g., sweep picking) |
| 25-35 min | Scale/theory | Modal practice with backing track |
| 35-50 min | Repertoire | Current song or solo, deliberate repetition |
| 50-60 min | Ear training / free play | Transcription or improvisation |
Adjust the blocks based on your current goals. If you're preparing for a performance, expand the repertoire block. If you're building new technique, expand the drill block. The key is that every session has a written plan before you pick up the guitar.
Riff Quest makes this kind of structured practice trackable without friction. The platform includes 144 built-in technical exercises with animated tablature, a points and ranking system that turns daily practice into measurable progress, and a detailed stats dashboard that shows exactly where your time is going. For players who struggle to maintain consistent habits, seeing that data changes behavior.
A few customization principles:
- Practice the hardest thing first, when mental energy is highest
- Never skip the warm-up, even on short sessions
- Log your metronome tempos so you can track speed gains over weeks
- Rotate technique focus weekly so no area goes unaddressed for more than seven days
The template above is a starting point. The best practice schedule is the one you'll actually follow consistently, so adjust the time blocks to fit your real schedule rather than an ideal one.
Conclusion: Turn Practice Into Measurable Progress
The gap between advanced players who plateau and those who keep improving comes down to one thing: structure. Talent and dedication matter, but without a deliberate system, both get wasted on comfortable repetition of existing skills.
Riff Quest was built specifically for this problem. The platform tracks your songs, techniques, and practice streaks without adding administrative overhead, includes 144 animated technical exercises so you always know what to work on next, and shows your progress through a detailed stats dashboard that makes improvement visible rather than just felt. Start your guitar progress with Riff Quest and turn every practice session into a data point you can build on.
Frequently Asked Questions
What are the most effective advanced guitar practice techniques for breaking through a plateau?
Breaking a plateau usually requires changing what and how you practice, not just how long. Apply deliberate practice for guitar by isolating the exact phrase or technique causing difficulty, slowing it down with a metronome, and rebuilding it with intention. Incorporate new challenges like string skipping, sweep picking arpeggios, or position shifting across the fretboard. Tracking your sessions with a tool like Riff Quest helps you spot which advanced guitar practice techniques are actually moving the needle.
How do professional guitarists structure their practice sessions?
Most serious players divide practice time into distinct blocks: warm-up with finger independence and dexterity exercises, technical work such as alternate picking or legato drills with a metronome, theory and fretboard navigation, and creative time for improvisation and learning songs. Using a guitar practice schedule template prevents any area from being neglected. The key is consistency and measurable goals over each session, not marathon unfocused playing.
How can I improve guitar speed without sacrificing accuracy?
Speed without accuracy is just noise. Start every metronome exercise for guitar at a tempo where you make zero mistakes, then increase by 2-5 BPM increments only after clean repetitions. Focus on tension-free playing, squeezing too hard kills both speed and accuracy. Alternate picking synchronization between the fretting and picking hand is often the hidden bottleneck. Record yourself to catch errors your ears miss in the moment.
What is deliberate practice for guitar and how is it different from regular practice?
Deliberate practice for guitar means targeting specific weaknesses with focused, goal-directed repetition and immediate feedback, rather than replaying things you already do well. Instead of running through a full song, you isolate the two bars where your sweep picking breaks down and drill only that. It requires concentration, honest self-assessment, and a system for tracking improvement. Platforms like Riff Quest are built around this model, turning vague practice into structured, measurable skill development.
How do guitar ear training techniques connect to becoming a better lead guitarist?
Guitar ear training techniques build the internal musical compass that separates players who just execute patterns from those who truly improvise. When you can hear a chord change and instinctively know which scale or mode fits, your soloing becomes musical rather than mechanical. Singing intervals, transcribing licks by ear, and learning to recognize harmonic minor or modal sounds all sharpen this skill. Combine ear training with music theory integration and your improvisational fitness improves dramatically.